Tello Drone Programming in SwiftUI - Part 1

Connect and Command #

Although I am writing a series of tutorials on how to program DJI drones, when I get asked which is the ideal beginner drone for learning to fly and also for programming, my standard answer is the Tello drone by Ryze. Let me give you a couple of reasons that speak for this drone:
- Fairly low price
- Easy to program in different programming languages
- Safe to fly indoors
- Very durable
Let’s be honest, there are some disadvantages as well:
- No GPS
- Not suitable in windy conditions
- Prone to WiFi interference
- Limited range
- No gimbal, fixed camera only
Ideally you already have a Ryze Tello drone, an iPhone and a MacBook, then this tutorial is the right place to start coding.
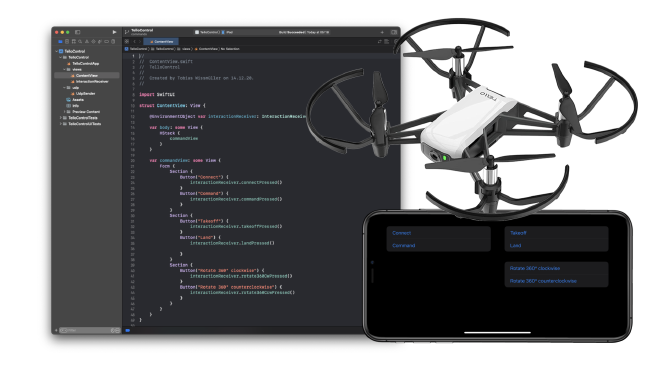
This tutorial will provide a complete iOS-app implemented in Swift and SwiftUI that will connect to the Tello drone to issue some commands, like takeoff and land.
In case you cannot live with the drawbacks of the Tello or you might have a specific use-case that can only be outdoors with extended range, I sincerely recommend my series “Programming DJI Drones”.
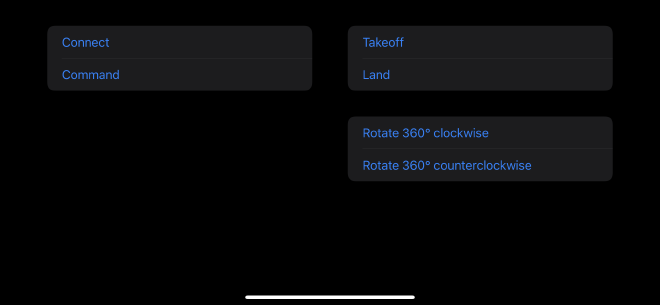
The example code will expose a couple of buttons. Each button will invoke a drone command. This is what I have implemented:
- Connect to the drone
- Enable command mode
- Takeoff
- Land
- Rotate by 360 degrees clockwise
- Rotate by 360 degrees counter-clockwise
Here is a screenshot of how the app will look like after you have build it and started it on your phone.

All the commands can be looked up in the manual of the Tello SDK. Please see the resources section at the end of this post for some further links.
With the code from this tutorial you have everything at hand to write your own app by extending the existing code.
There are at least two more tutorials in the pipeline for the Tello drone.
The second tutorial is all about receiving telemetry data and displaying it in real-time in the app.
In the third part we are tapping into the video stream of the Tello drone and show it full-screen on the iOS device.
The complete code for this tutorial can be downloaded from here.
Establishing a Connection #
The basis for all communication with the Tello drone is based on UDP and can be found in the class UdpSender that is part of the accompanying tutorial app.
In order to be able to send commands like takeoff and land we first need to connect.
We are using Apples Network-Framework which makes it fairly easy to establish a UDP-connection and send some data.
The following code is part of the UdpSender and when being called initiates the connection to a host with a certain port.
func connect() {
  connection = NWConnection(host: host, port: port, using: .udp)

  connection!.stateUpdateHandler = { (newState) in
    ...
  }

  connection!.viabilityUpdateHandler = { (isViable) in
    ...
  }

  connection!.betterPathUpdateHandler = { (betterPathAvailable) in
    ...
  }

  connection!.start(queue: .global())
}
Only after this step we can issue commands to make the drone do what it is supposed to do: to takeoff and fly.
Command Mode #
The Tello drone explicitly needs to be set into command-mode before we can issue other commands like takeoff and land.
You can check if your drone is already in command-mode when the front-light is blinking slowly in green. If its blinking in red after a while it has not received a command within 15 seconds.
The Tello SDK-documentation has the complete list of all available commands that can be send to the drone.
The UdpSender has all the code to send the command.
func send(_ payload: Data) {
  guard let connection = self.connection else { return }

  connection.send(content: payload, completion: .contentProcessed({ sendError in
    ...
  }))
}
Well, I wish I could write more about it, but there is not more. It is really that simple.
When the Tello receives a command and has finished executing it, it will reply with an “ok”.
What I have noticed is, that sometimes this “ok” is kind of scrambled and the console will just display some weird characters. That does not impact sending another command to be executed.
Go ahead and build the app on your iPhone. We will need it in the next step.
Takeoff and Fly #
Now, with the app being build and ready to be launched on your iPhone, it is time to get the drone airborne.
Follow these steps:
- Insert battery into drone
- Switch on the drone, after a while it should blink yellow
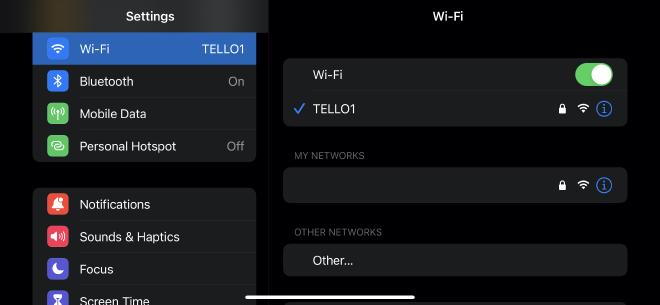
- Connect your phones WiFi to the network of the drone

- Start the app
- Press the “Connect”-button
- The drone should blink green now.
- Press the “Takeoff”-button
Well done and happy flying!
Conclusion #
Now you have everything at hand to control your Tello drone with your own SwiftUI-app.
Go ahead and extend it with more commands.
In the meantime I am working on the second part of the tutorial for receiving and displaying telemetry data.
The complete code for this tutorial can be downloaded from here.
- If you enjoyed this, please follow me on Medium
- Buy me a coffee to keep me going
- Support me and other Medium writers by signing up here