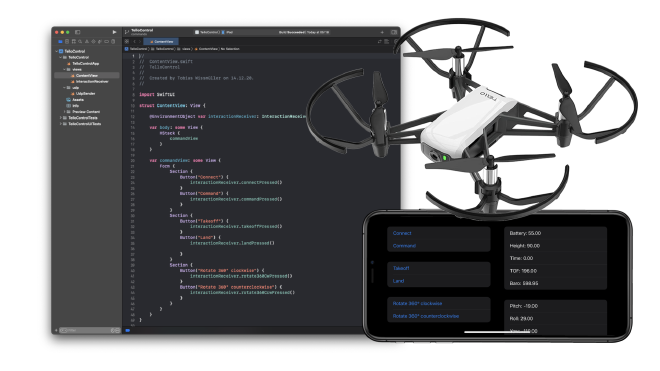
Tello Drone Programming in SwiftUI - Part 2

Telemetry #

Welcome back! I hope you have enjoyed Part 1 of this series and that you are now eager for more.
In this part we are going to tap into the telemetry data that is being sent out by every Tello drone. A UDP listener is required that will receive all incoming packets from the drone. This listener has been implemented based on Apples Network framework. How this listener has been implemented is the core part of this tutorial.
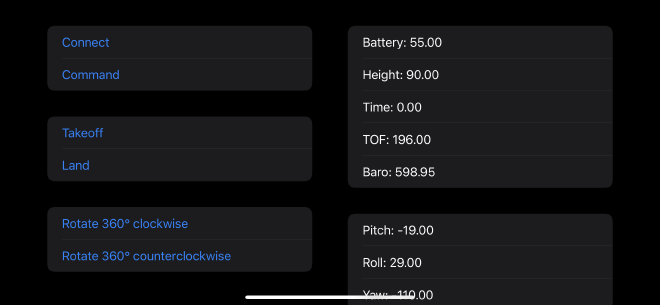
The finished app looks like this.

On the left side are the controls to connect to the drone, put it into command mode and perform a few flying actions, like takeoff and landing. These functions were part of part 1.
The right side shows all the new stuff from this tutorial, the telemetry data, like for example
- the percentage of the current battery level
- the flying height in cm
- the degree of the attitude pitch, roll and yaw
- speeds of the x, y and z axis
The complete code for this tutorial can be downloaded from here.
The tutorial is structured into the following sections according to how the data flows:
- receiving,
- processing and
- displaying
the telemetry data.
Let’s spin up our motors and get started.
Receiving the Telemetry Data #
The basis for receiving telemetry data is a UDP listener that has been implemented using Apples Network Framework.
Creating the Listener #
Everything is based on the NWListener, which is described as
“An object you use to listen for incoming network connections.”
Let’s begin by instantiating one.
var listener: NWListener?

do {
    listener = try NWListener(using: .udp, on: port)
} catch {
    print("exception upon creating listener")
}
Next, the behaviour of stateUpdateHandler needs to be defined. It is described as follows:
“A handler that receives listener state updates.”
listener?.stateUpdateHandler = {(newState) in
    switch newState {
    case .ready:
        print("ready")
    default:
        break
    }
}
Accepting new Connections #
For now the listener can handle state updates, but the fun begins when a new connection begins.
Another handler needs to be implemented. It is the [newConnectionHandler](https://developer.apple.com/documentation/network/nwlistener/
2998663-newconnectionhandler), which is explained in the documentation as
“A handler that receives inbound connections.”
listener?.newConnectionHandler = {(newConnection) in
    newConnection.stateUpdateHandler = {newState in
        switch newState {
        case .ready:
            print("ready")
        default:
            break
        }
    }
    newConnection.start(queue: DispatchQueue(label: "newconn"))
}
Receiving Messages #
When the connection is ready a handler needs to be assigned to receiveMessage:
“Schedules a single receive completion handler for a complete message, as opposed to a range of bytes. "
connection.receiveMessage { (data, context, isComplete, error) in
    // Decode and continue processing data
}
Starting the Listener #
Everything is in place to start up the listener with start. It is described as:
“Registers for listening, and sets the queue on which all listener events are delivered.”
listener?.start(queue: .main)
Processing the Telemetry Data #
This section is all about the TelemetryPublisher-class of the example application which is using Apples Combine-Framework.
From this framework especially two structures are being used:
The Published property wrapper:
A type that publishes a property marked with an attribute.
The PassthroughSubject:
A subject that broadcasts elements to downstream subscribers.
When the Data is being received in the UdpListener, it will be forwarded to the PassthroughSubject which will decode the Data into a String so it can be parsed further.
This String looks like this:
mid:257;x:0;y:0;z:0;mpry:0,0,0;pitch:0;roll:0;yaw:0;vgx:0;vgy:0;vgz:0;templ:76;temph:77;tof:10;h:0;bat:32;baro:531.77;time:0;agx:11.00;agy:-15.00;agz:-1002.00;
This will be spliced up and parsed into a TelemetryData-object which is then published via the Published property wrapper.
The TelemetryPublisher needs to be of type ObservableObject.
“A type of object with a publisher that emits before the object has changed.”
This is especially important for the next step. For now we have received the telemetry data, parsed it and provided a mechanism to update our user interface. Now we actually need to use this mechanism in our user interface so it gets updated whenever the telemetry data changes.
Displaying the Telemetry Data #
Our ObservableObject from the previous step needs to be made available in our SwiftUI-environment. In the tutorial application this is our ContentView-class.
We are going to provide the TelemetryPublisher as EnvironmentObject.
A property wrapper type for an observable object supplied by a parent or ancestor view.
In code, thats as easy as calling
ContentView().environmentObject(telemtryPublisher)
In the ContentView the TelemtryPublisher is being provided with
@EnvironmentObject var telemetryPublisher: TelemetryPublisher
Now we only need to access our telemetry values and display them in the ContentView, e.g.
Text("Battery: \(String(format: "%.2f", telemetryPublisher.data.bat))")
Thanks to the declarative nature of SwiftUI, that’s all we need to do. The ContentView will be updated automatically whenever the telemetry data changes.
Conclusion #
We are done. Now, after this second part we cannot only command the drone, but also receive valuable telemetry data which informs us about the state of the drone.
This concludes the second part of this tutorial series.
The complete code for this tutorial can be downloaded from here.
- If you enjoyed this, please follow me on Medium
- Buy me a coffee to keep me going
- Support me and other Medium writers by signing up here