Building A Lightweight Camera App In SwiftUI
A Beginner-Friendly Tutorial For Everyone #
Building a camera app is a typical task for an iOS-developer that might cross your path someday. There are plenty of tutorials out there that show you exactly that. I have also linked one that I especially liked down in the resources section.
Almost all that I could find are using UIKit and AVFoundation. Of course, I wanted something in SwiftUI, and as simple as possible.
On Apples site on Cameras and Media Capture, it says about AVFoundation:
Build a custom camera UI to integrate shooting photos or videos into your app’s user experience.
What I wanted wasn’t a custom camera app, but a very simple one, just right out-of-the-box. The same site also states:
To instead let the user capture media with the system camera UI within your app, see UIImagePickerController.
Well, there we have it. Let’s explore this a bit further.
There are two ways of selecting an image with UIImagePicker:
- By selecting a photo from your photo library
- Or by taking a photo with your phones built-in camera.
The first one is deprecated for UIImagePicker and has been replaced by PHPicker.
This tutorial explains the second way and will lead you through all the steps required to create a lightweight camera app for your iOS-device with as little code as possible.
Depending on your use case, using UIImagePicker might be completely sufficient. No need to use a more complex solution with AVFoundation.
A drawback of UIImagePicker is, that it is only capable of shooting in portrait mode. Hopefully landscape mode will be supported some day.
Anyways, if your requirements are fine with this limitation, this is how the app will look like:
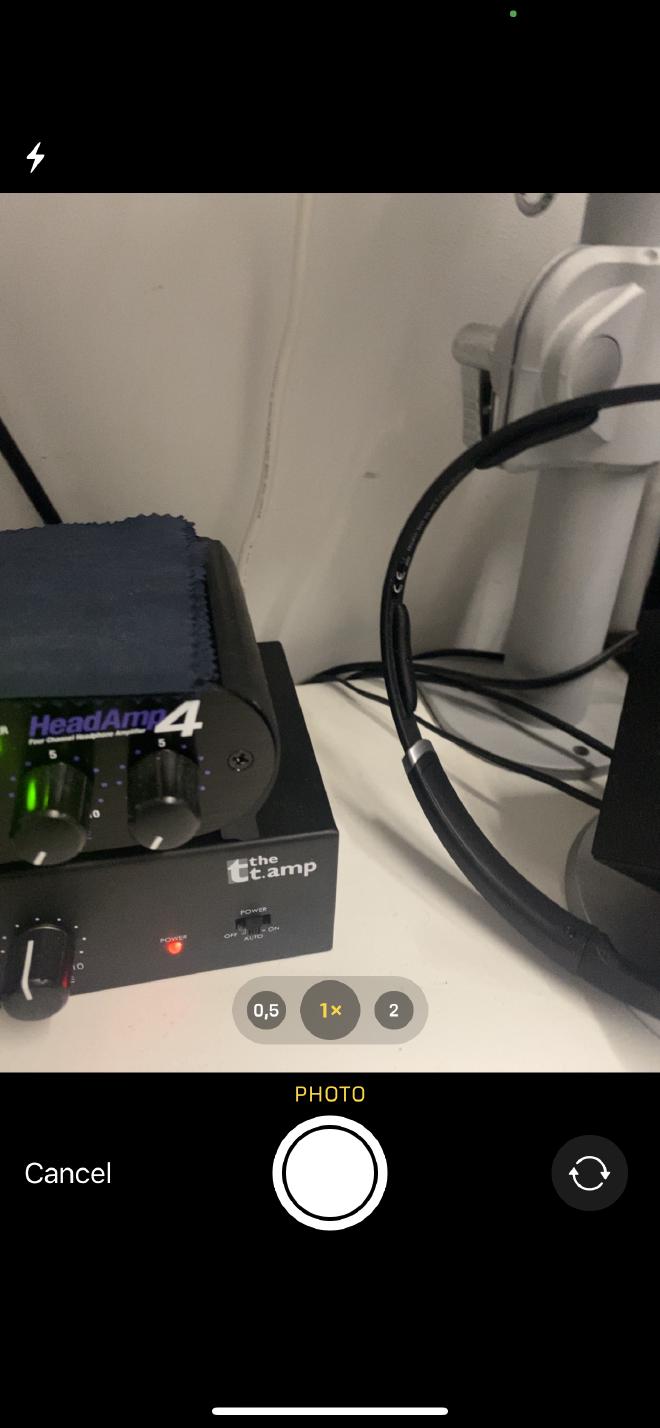
Looks familiar? It sure does!
Project Setup #
Let’s start by creating a new iOS project first.
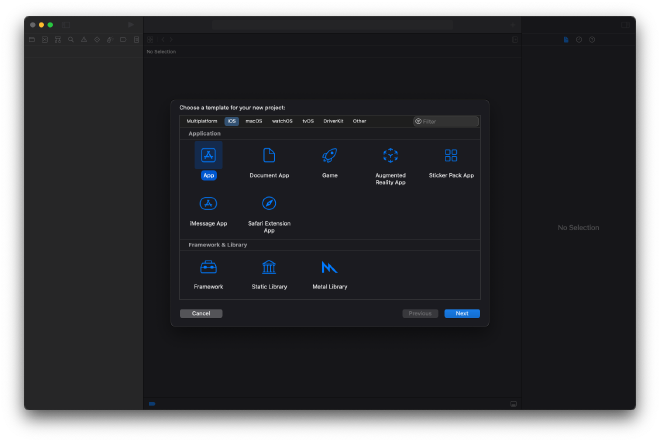
Then we choose all the options. Well, nothing special here. We are going to write a SwiftUI-application where we don’t need any Core Data or Tests.
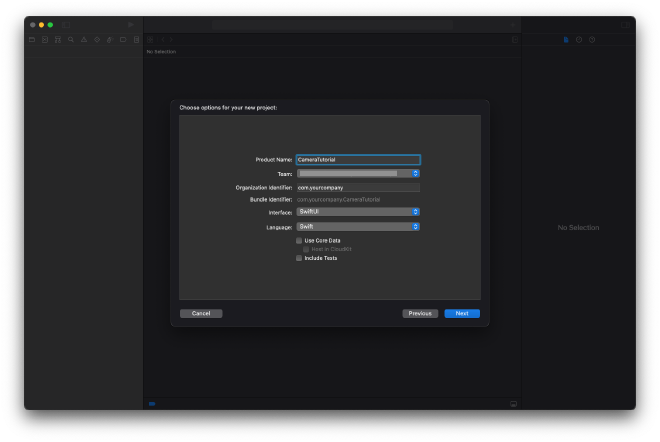
Check the provided infos and create the project files.
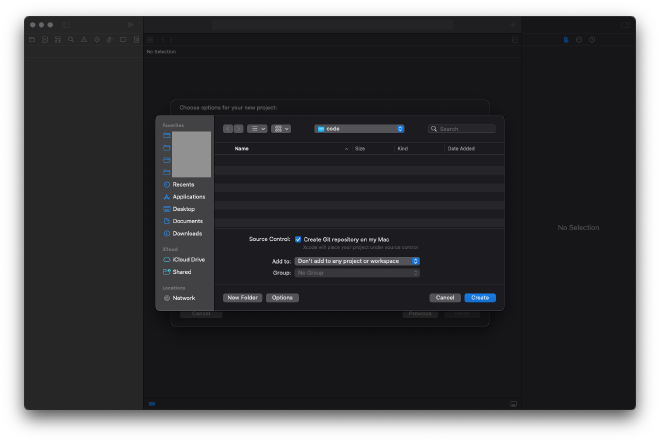
Let’s compile and start it for the first time. We end up with the standard “Hello World” application.
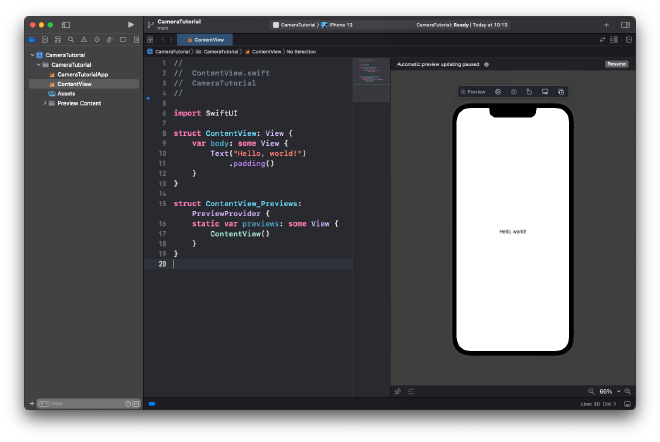
All set! Ready for development!
Development #
As mentioned in the beginning, we are going to use UIImagePickerController. Unfortunately we cannot directly use it as a SwiftUI-view.
Fortunately there is UIViewControllerRepresentable which will help us. I have explained the principle of how to use UIKit-views in SwiftUI in this article:
https://itnext.io/using-uiview-in-swiftui-ec4e2b39451b
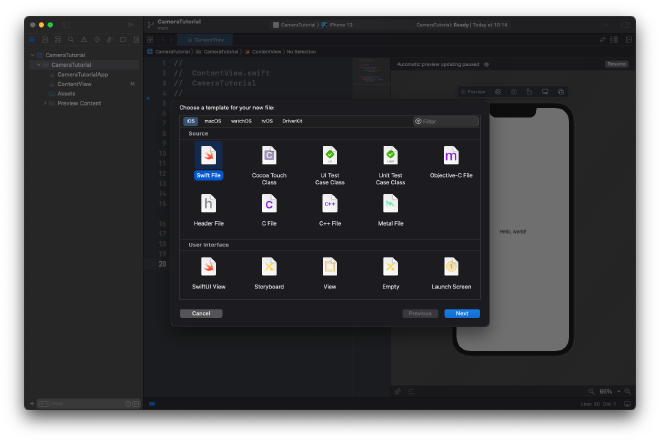
First, we need a new file that will hold our CameraView:
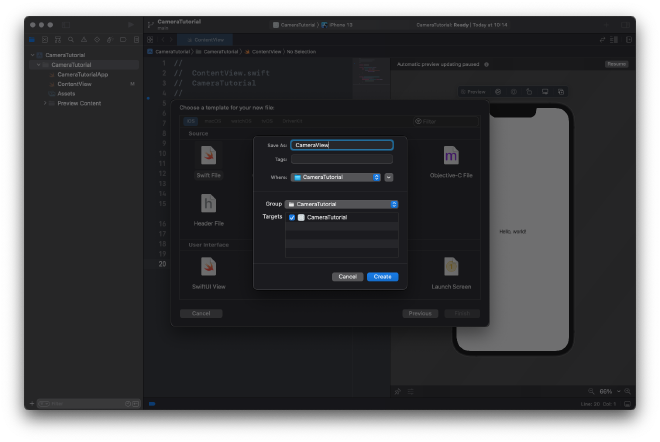
And of course we save it accordingly:
Finally, we end up with this and are ready to add our code:
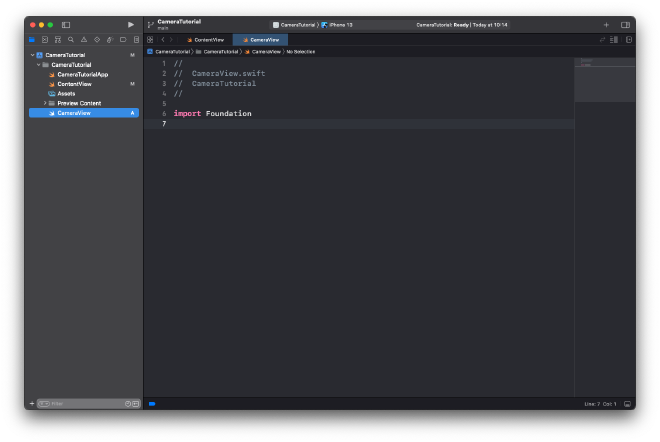
All we need in our CameraView is the following code:
import Foundation
import UIKit
import SwiftUI

struct CameraView: UIViewControllerRepresentable {

    typealias UIViewControllerType = UIImagePickerController


    func makeUIViewController(context: Context) -> UIViewControllerType {
        let viewController = UIViewControllerType()
        viewController.delegate = context.coordinator
        viewController.sourceType = .camera
        return viewController
    }

    func updateUIViewController(_ uiViewController: UIViewControllerType, context: Context) {

    }

    func makeCoordinator() -> CameraView.Coordinator {
        return Coordinator(self)
    }
}

extension CameraView {
    class Coordinator : NSObject, UIImagePickerControllerDelegate, UINavigationControllerDelegate {
        var parent: CameraView

        init(_ parent: CameraView) {
            self.parent = parent
        }

        func imagePickerControllerDidCancel(_ picker: UIImagePickerController) {
            print("Cancel pressed")
        }

        func imagePickerController(_ picker: UIImagePickerController, didFinishPickingMediaWithInfo info: [UIImagePickerController.InfoKey : Any]) {
            if let image = info[UIImagePickerController.InfoKey.originalImage] as? UIImage {
                UIImageWriteToSavedPhotosAlbum(image, nil, nil, nil)
            }
        }
    }
}
Almost there, we only need to add the CameraView to our ContentView:
struct ContentView: View {
    var body: some View {
        CameraView()
    }
}
That’s it. Nothing more to add. Oh, wait a minute …
When we run the app for the first time and get this error message:
2021-12-20 09:41:07.629751+0100 CameraTutorial[17091:5169429] [access] This app has crashed because it attempted to access privacy-sensitive data without a usage description. The app's Info.plist must contain an NSCameraUsageDescription key with a string value explaining to the user how the app uses this data.
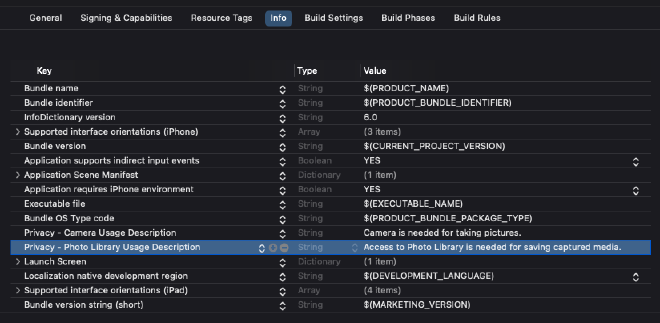
Let’s set the usage description:
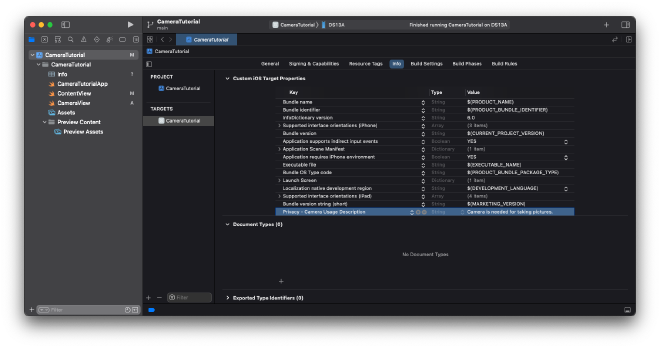
Let’s try again. Looks good.
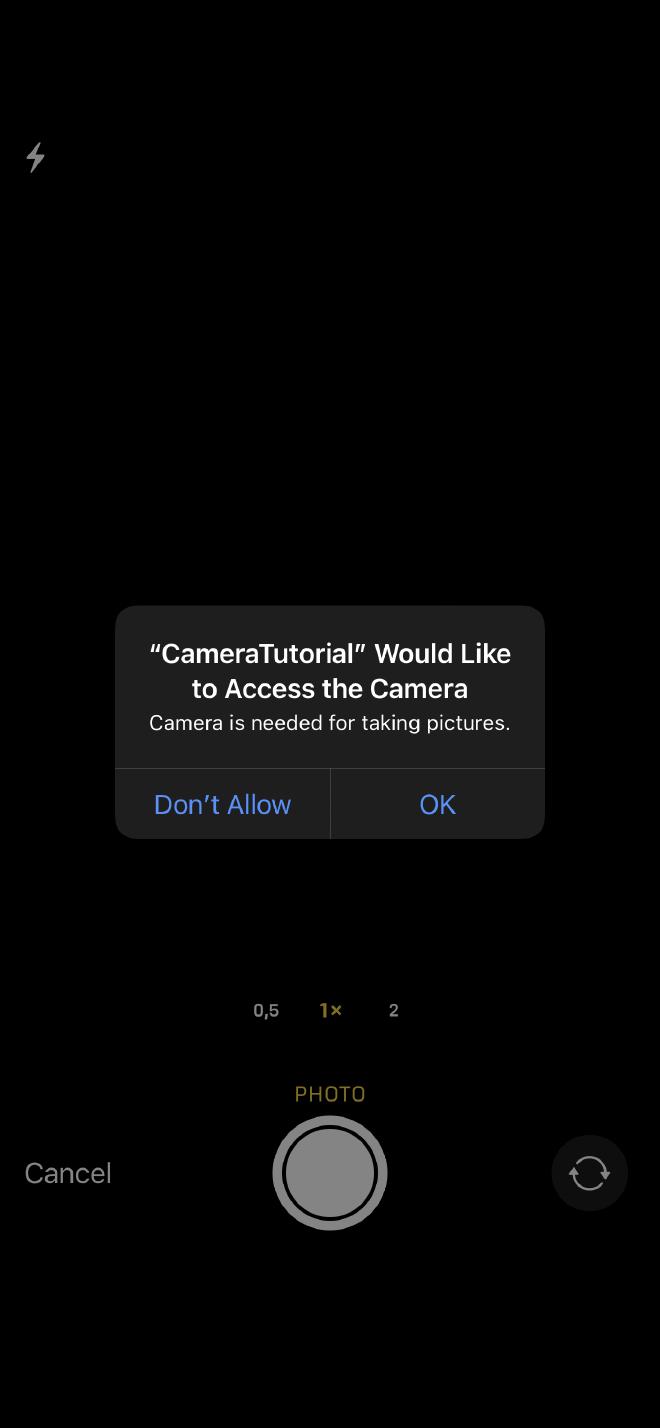
We need to press “OK” and then we can use the camera:

We can now do the following
- Enable the flash
- Switch to wide angle, normal, zoom (if your device supports them) and selfie lens
- Press the “Cancel”-button
- Press the shutter to take a photo
Just as an FYI, when we put camera into landscape, it is all messed up:
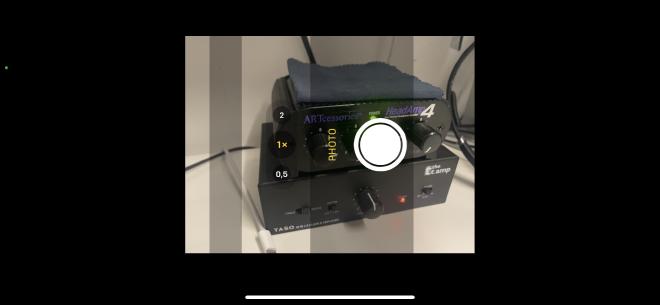
Nothing we didn’t already know. Hopefully, Apple will add landscape mode or provide us with another ready-built solution.
Anyways, when pressing the shutter button we get the following:
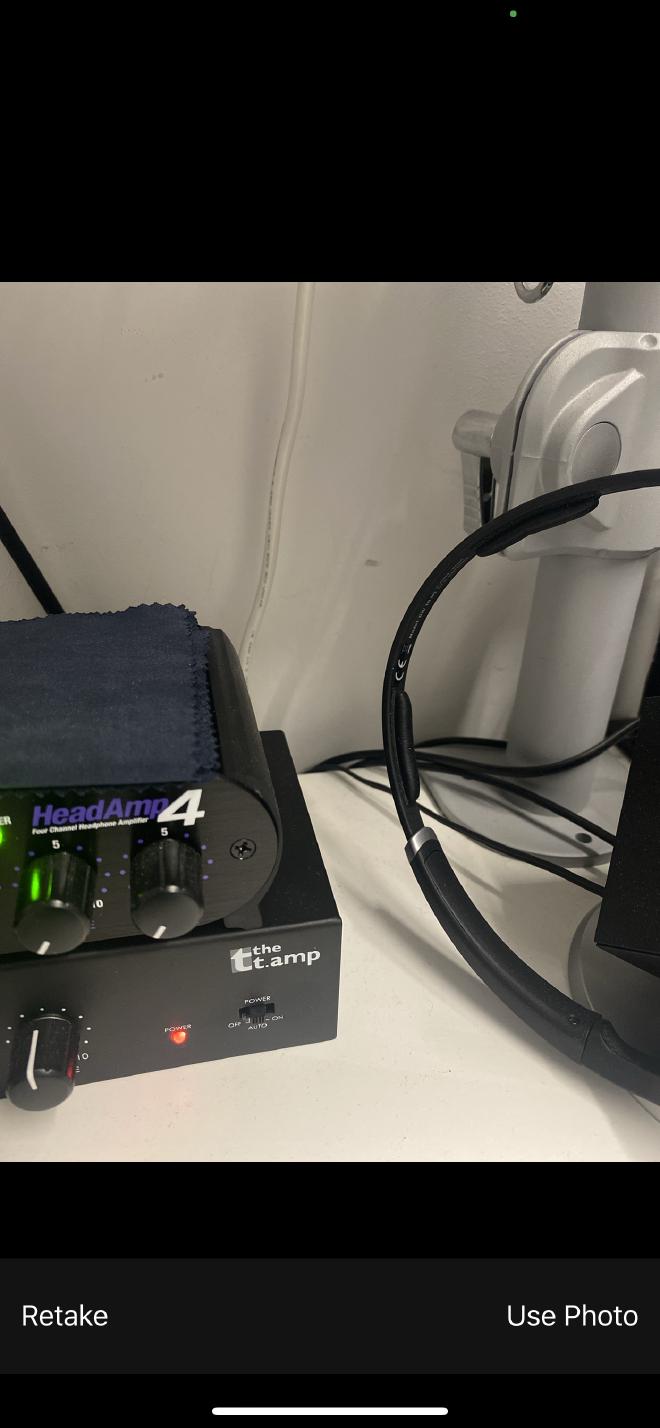
We can now either press “Retake” where we get back to the camera view or we press “Use Photo” for saving it.
The Coordinator has the responsibility of reacting to pressing “Cancel” and “Use Photo”.
For Cancel we have implemented the following delegate which does nothing other than printing “Cancel pressed”
func imagePickerControllerDidCancel(_ picker: UIImagePickerController)
For Use Photo we have implemented
func imagePickerController(_ picker: UIImagePickerController, didFinishPickingMediaWithInfo info: [UIImagePickerController.InfoKey : Any])
There we save the image to our photo album with
UIImageWriteToSavedPhotosAlbum(image, nil, nil, nil)
Using this the first time, we get another error
This app has crashed because it attempted to access privacy-sensitive data without a usage description. The app's Info.plist must contain an NSPhotoLibraryAddUsageDescription key with a string value explaining to the user how the app uses this data.
Therefore we need to set another usage description
Then we get the following dialog
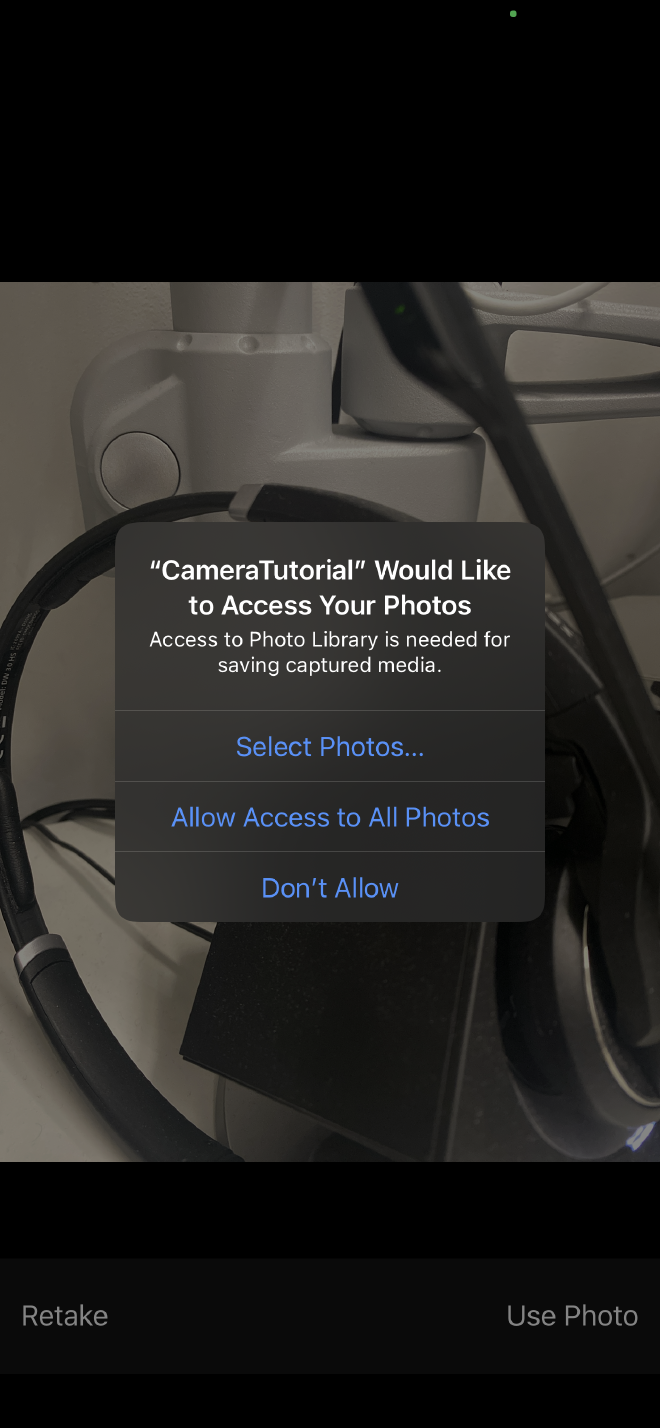
Which we confirm by allowing access.
Now you can check with your photos app if the image is there.
Hopefully everything worked out and you can find the newly taken photo in your photos app.
Conclusion #
That’s about it. We are done for today with the most minimalistic camera app that I was able to figure out.
Let me know if this can be made even more minimalistic.
Thank you for reading!
- If you enjoyed this, please follow me on Medium
- Buy me a coffee to keep me going
- Support me and other Medium writers by signing up here
https://twissmueller.medium.com/membership