First Steps with Upstash for Kafka
True-Serverless Event-Infrastructure #
There is no denying, that the new Apple M1 MacBooks are awesome. I wouldn’t consider myself a fanboy, but those machines are awesome. Let me repeat myself: just awesome. Those processors totally rock in many aspects.
Of course, here comes the “but”. Not everything is at a state where I can seamlessly shift from Intel to ARM.
As a heavy Docker user, I had to learn my lesson and needed to look somewhere else for now regarding running Kafka on my local Docker instance.
Searching the universe for Kafka Docker images with ARM support left me empty-handed.
Well, just have a look at those issues over at Github and you understand what I am talking about.
Maybe there is support by the date this article got released. Anyways, I have stopped searching for now. In case there is an update, please let me know in the comments. Highly appreciated!
Time to look for other solutions.
I have never really tried a cloud based solution for Kafka and always used local or on-premise solutions which had to do with the nature of the projects I am dealing with. Just had a few occasions where I went into the “real” cloud.
What I have never liked with most cloud providers, that I have to purchase a certain quota up-front. Then, when that project is finished, all that hard-earned cash just sits there and will be forgotten after a while.
Three Reasons for Using Upstash #
I needed an on-demand, pay-as-you-go solution without having to fiddle around with things like hardware, virtual machines or docker containers.
Second, it shouldn’t cost anything when not in use. Yes, it should be able to scale it to 0 and with 0 I mean there is nothing to pay at all.
Third, it should not cost anything for trying out stuff for a while without causing much traffic. Perfect for any side-hustle and educational projects.
The solution is Upstash, a true-serverless offering for Kafka and Redis.
Check their document “AWS MSK and Confluent. Are they really Serverless?” to get an in-depth comparison of different cloud providers and their offerings and how they compare to cost.
Creating a Cluster and a Topic #
After creating an account, which does not require you to disclose any cred-card data, go to the Kafka section and hit “Create Cluster”.
Enter a name for your cluster and choose the region and if it is supposed to be a single- or multi-zone cluster.
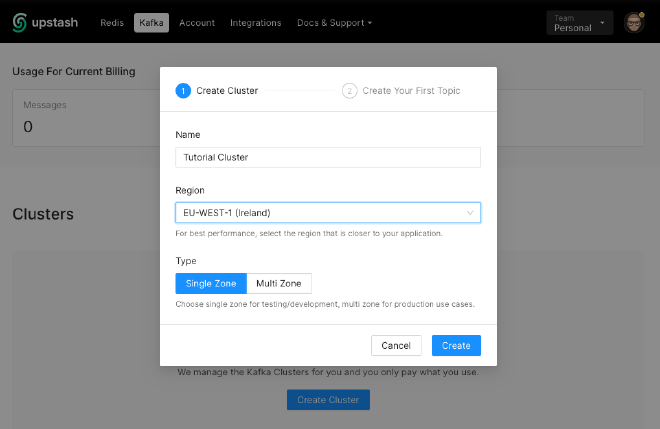
After the cluster has been created, we need to create the first topic.
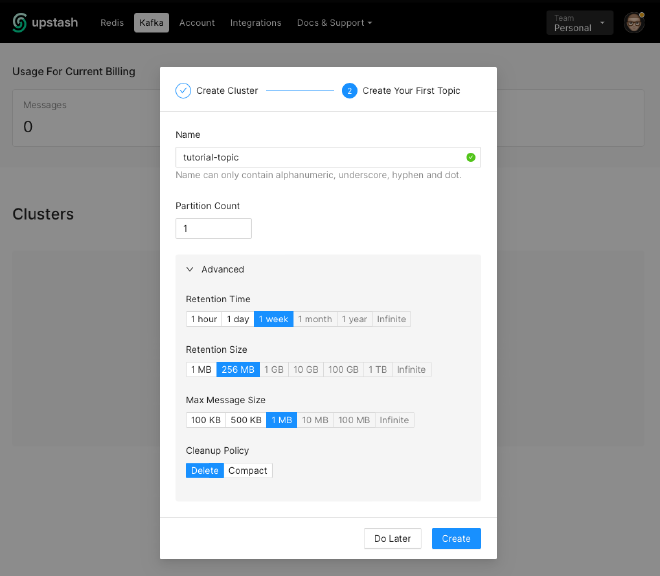
Don’t worry about what options to choose. Go with the defaults and change later accordingly.
Done, we are all set-up and can run a first test if we can use or cluster.
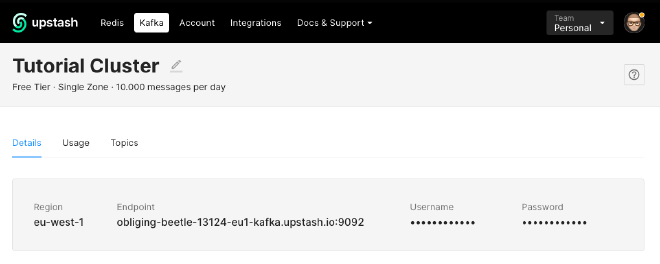
Testing the Cluster #
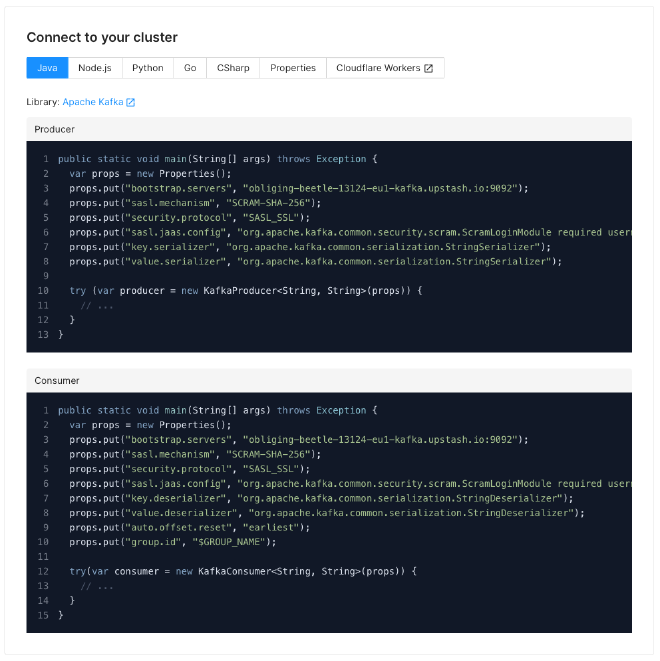
Luckily enough, the guys from Upstash will provide you with pre-made example that you just need to copy-and-paste.
The values for bootstrap.servers and sasl.jass.config will be created dynamically for you. Don’t copy what is below, because this exact configuration belonged to my cluster that I have created for this tutorial and has been deleted right after I was done.
You don’t need to code anything for a quick “smoke test”. Just use their REST-Api, e.g. with curl or Postman.
Again, thanks to the Upstash-team provides the complete curl-commands for producing and consuming sample messages.
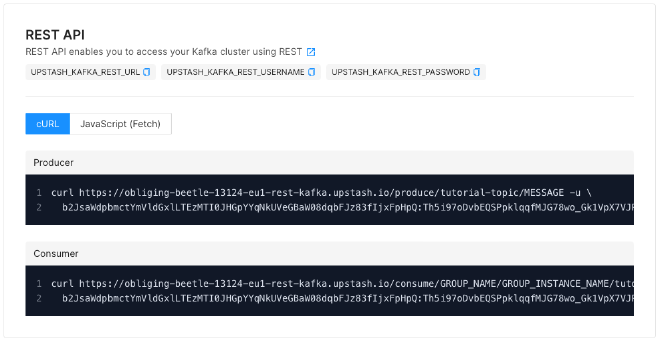
So, let’s give it a try:
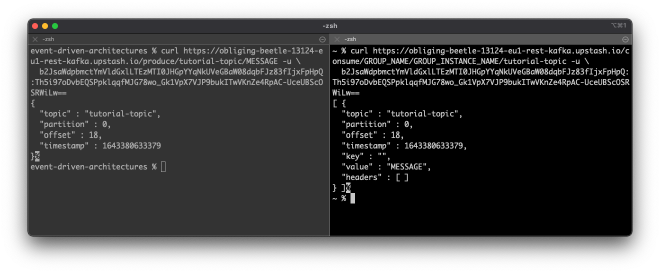
On the left, I have issued the command for the producer and on the right the one for the consumer. As you can see, I have published an event to my tutorial-topic and actually it was not my first message but message with offset 18.
Conclusion #
My little “excursion” to using a true serverless Kafka-infrastructure was a success.
All my requirements have been met and realising them didn’t cost me anything.
I will try this service in the future and keep you guys updated.
Thank you for reading!
- If you enjoyed this, please follow me on Medium
- Buy me a coffee to keep me going
- Support me and other Medium writers by signing up here