Triggering AWS Lambda Functions from Serverless Kafka
Today, we are going to bridge two worlds. One world is Serverless Kafka and the other is the one of Serverless Functions.
This tutorial will demonstrate how to generate Kafka messages that will trigger Lambda Functions. The Kafka instance will be running on Upstash whereas for the Lambda Functions we are going to use AWS.
Upstash is an on-demand, pay-as-you-go solution without having to fiddle around with things like hardware, virtual machines or docker containers. It doesn’t cost anything when not in use. It literally scales down to 0, whereas 0 means no cost at all.
There are several steps that need to be completed before we can send messages from our local machine to Kafka on Upstash that will then be received by AWS and trigger our Lambda function.
In case you prefer to use your own or any other Kafka instance you just need to adapt the different steps of this tutorial accordingly.
In detail, these steps are:
- Create a Kafka Cluster and Topic on Upstash
- Start a producer and a consumer for testing the cluster
- Create Secret
- Create Lambda Function
- Create Lambda Role
- Create Trigger
- Testing the Setup
There is a lot to do, let’s not waste time and get right into the work.
Create a Kafka Cluster and Topic on Upstash #
If not already done so, head over to Upstash to create an account. When done, go to the Console and create a new cluster.
First, we provide the name for the cluster and its region.

In the next step, we are going to create the topic that will receive our messages. Basically, I have just provided the name and kept everything at its default.

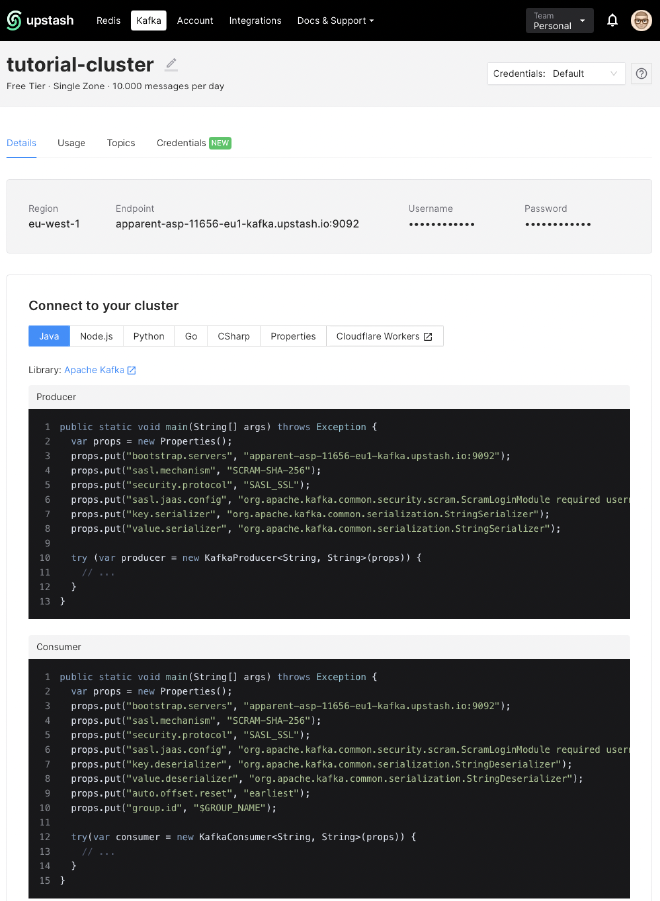
When this is finished, the overview page of the cluster is shown. This page provides all the necessary info that is required to connect to the cluster. We will need this in the next section.
Now, that our Kafka cluster is in its place, we are going to test it.
Start a producer and a consumer for testing the cluster #
Kafka comes with its own command-line tools that are very useful for querying and testing a Kafka-cluster. Those can be either installed directly on a local machine or being used via the official Kafka Docker image.
In particular we are going to use the commands kafka-console-producer and kafka-console-consumer. To keep things simple I am using the commands as if they were on my local machine.
Here is an example to show you the difference. The basic way to start a consumer if it has been directly installed on your machine would be:
kafka-console-consumer.sh --topic planes --from-beginning --bootstrap-server kafka:9092
Doing the same, but this time with the help of the official Kafka Docker image, it looks like this:
docker-compose exec kafka bash -c 'kafka-console-consumer.sh --topic planes --from-beginning --bootstrap-server kafka:9092'
For Upstash we need to add a bit of configuration because we need to authenticate. It should not be possible for everyone to connect to your cluster, right?
In the working directory of your local machine create a file called upstash.config and properties from the Upstash console into it.
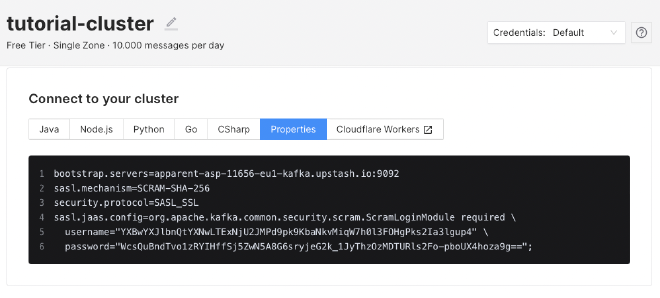
The property bootstrap.servers is not needed. This is how it should look, except the credentials that differ from mine.
sasl.mechanism=SCRAM-SHA-256
security.protocol=SASL_SSL
sasl.jaas.config=org.apache.kafka.common.security.scram.ScramLoginModule required username=\"YXBwYXJlbnQtYXNwLTExNjU2JMPd9pk9KbaNkvMiqW7h0l3FOHgPks2Ia3lgup4\" password=\"WcsQuBndTvo1zRYIHffSj5ZwN5A8G6sryjeG2k_1JyThzOzMDTURls2Fo-pboUX4hoza9g==\";"
Then start the producer.
kafka-console-producer --bootstrap-server apparent-asp-11656-eu1-kafka.upstash.io:9092 --producer.config upstash.config --topic tutorial-topic
In another console, start the consumer.
kafka-console-consumer --bootstrap-server apparent-asp-11656-eu1-kafka.upstash.io:9092 --consumer.config upstash.config --from-beginning --topic tutorial-topic
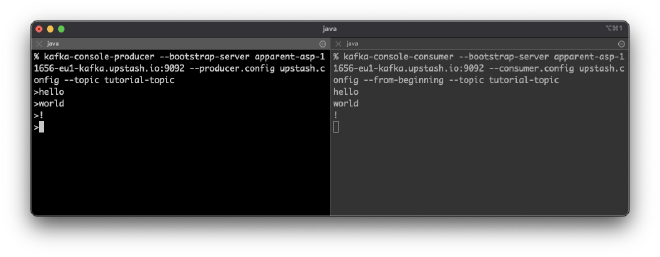
Finally, we can send some messages from the producer and receive them in the consumer.
Now, it is time to head over to Amazon AWS to create and setup the different pieces we need to trigger our Lambda function with a Kafka message.
Create AWS Secret #
Go to the AWS Secrets Manager and click on “Store a new secret”.
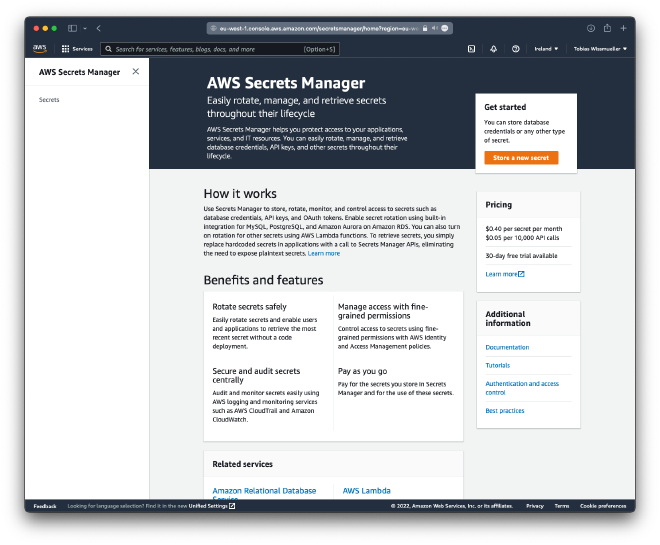
Choose “Other type of secret” and add the following key/value-pairs for your Upstash username and password.
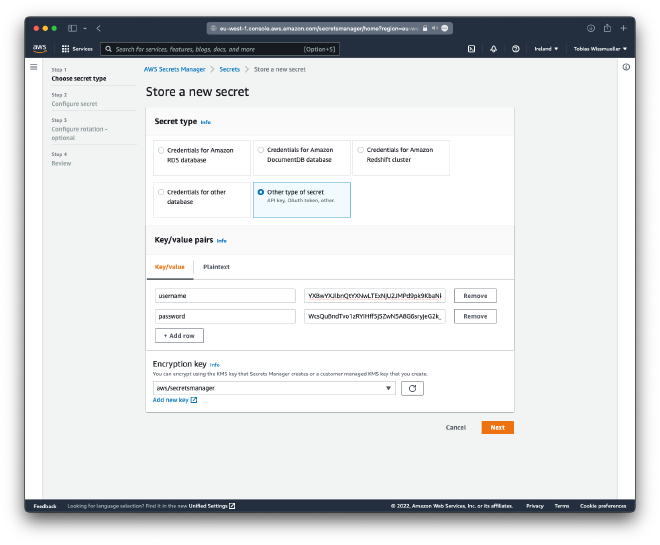
Click “Next” and provide a name for the secret.
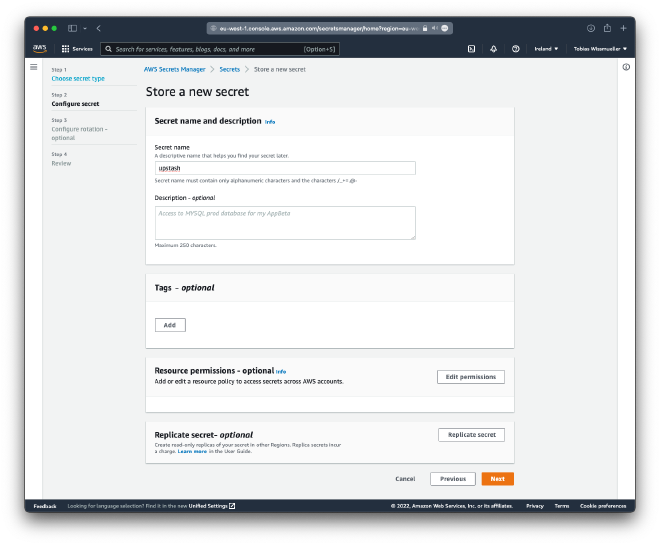
Then click “Next” and then in the “Store a new secret”-page also click “Next” and then “Store” without changing anything.
This is done, let’s go on to the next part where we create our Lamdba Function.
Create the Lambda Function #
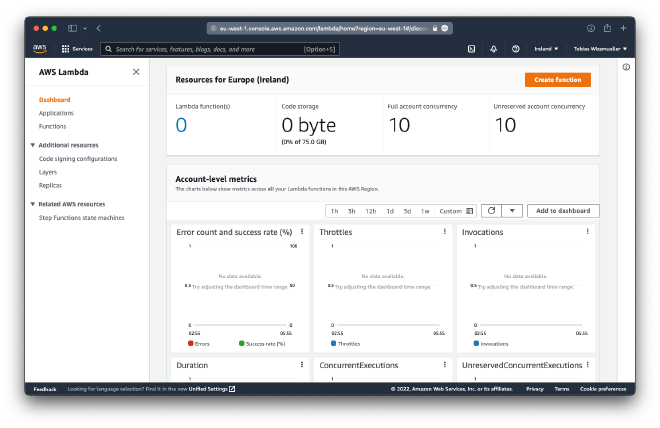
In AWS Lambda click on “Create function”.
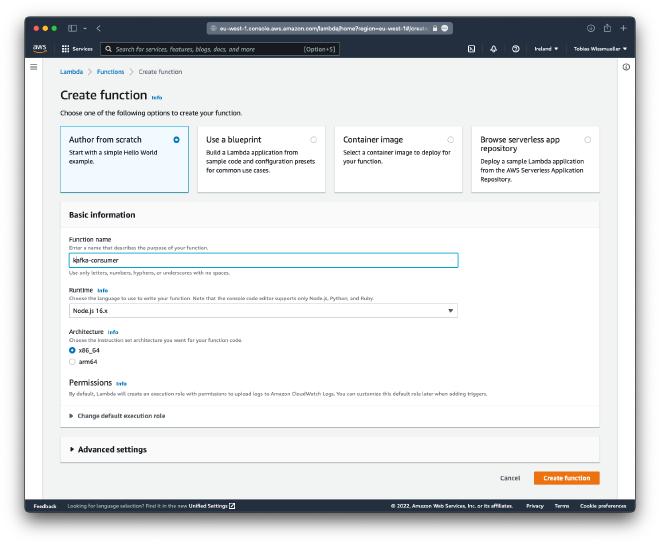
There, we are going to create a Node.js function called “kafka-consumer”. Click “Create function” again when done.
Replace the contents of index.js with
exports.handler = async (event) => {
    for (let key in event.records) {
      console.log('Key: ', key)
      event.records[key].map((record) => {
        console.log('Record: ', record)
        const msg = Buffer.from(record.value, 'base64').toString()
        console.log('Message:', msg)
      })
    }
}
This function will basically just print the contents of the Kafka event that it has been triggered from.
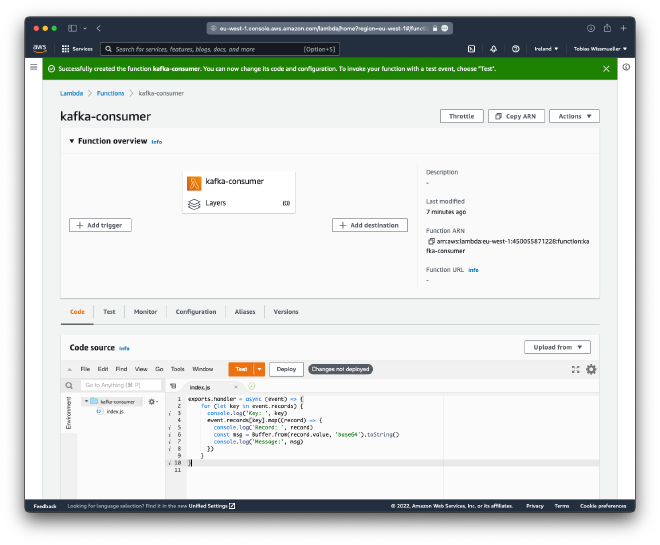
Then click “Deploy”.
Create Lambda Role #
Click on “Configuration” then “Permissions” and select the role name, here “kafka-consumer-role-eov2kffe”.
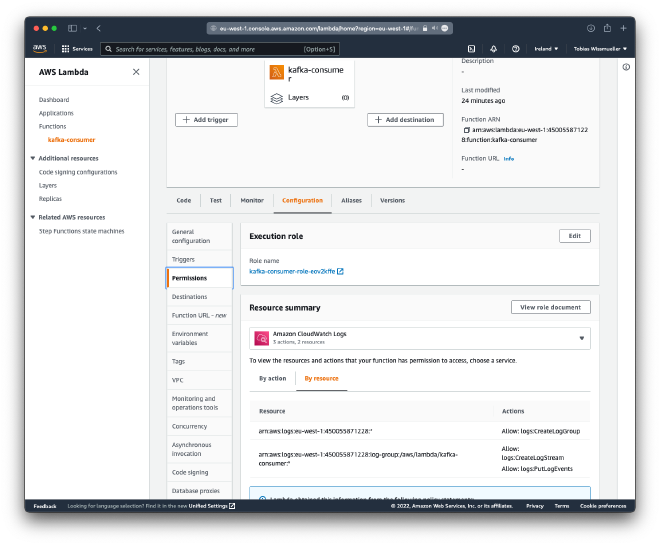
Now, the “Identity and Access Management (IAM)”-console has been opened.
Under “Add permissions” select “Create inline policy”
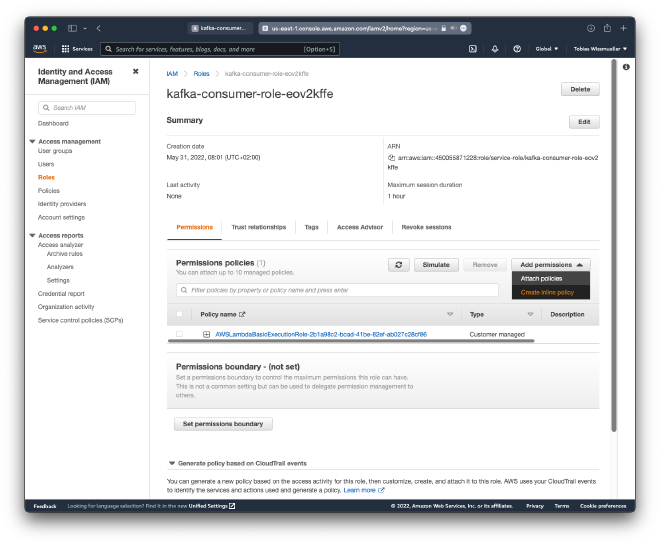
In the “JSON”-tab add the following.
{
    "Version": "2012-10-17",
    "Statement": [
        {
            "Effect": "Allow",
            "Action": [
                "secretsmanager:GetSecretValue"
            ],
            "Resource": "arn:aws:secretsmanager:eu-west-1:450055871228㊙️upstash-xcYDmy"
        }
    ]
}
Make sure to replace the function ARN that you can find on the overview page of the lambda function.
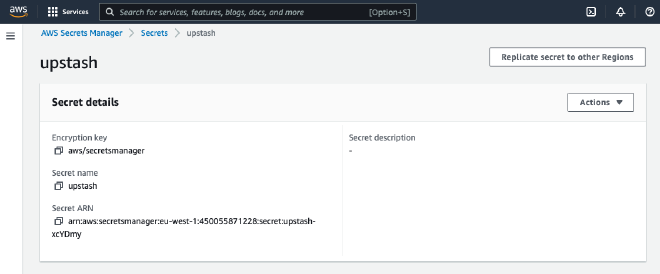
When you are done, the policy should look like this.
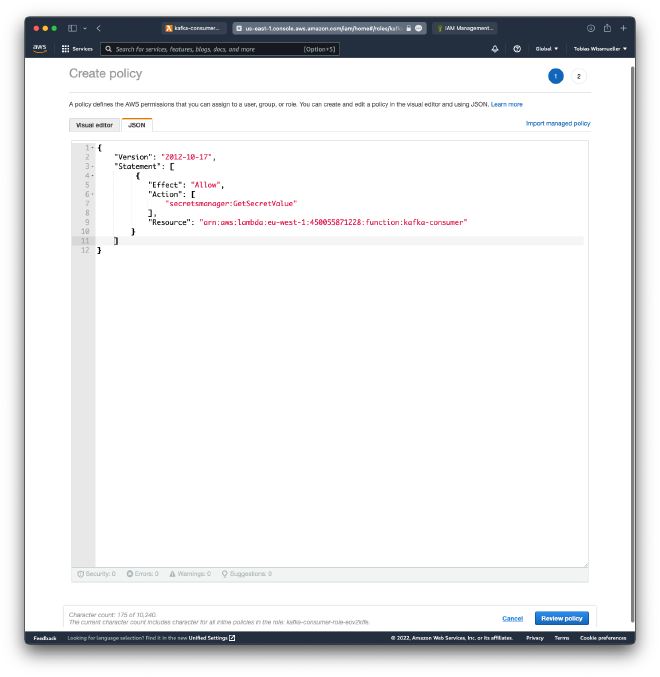
Click “Review Policy”.
Under “Review Policy” add the name, e.g. “SelfHostedKafkaPolicy” and click “Create policy”.
If everything worked, the policy is now listed under the IAM roles page
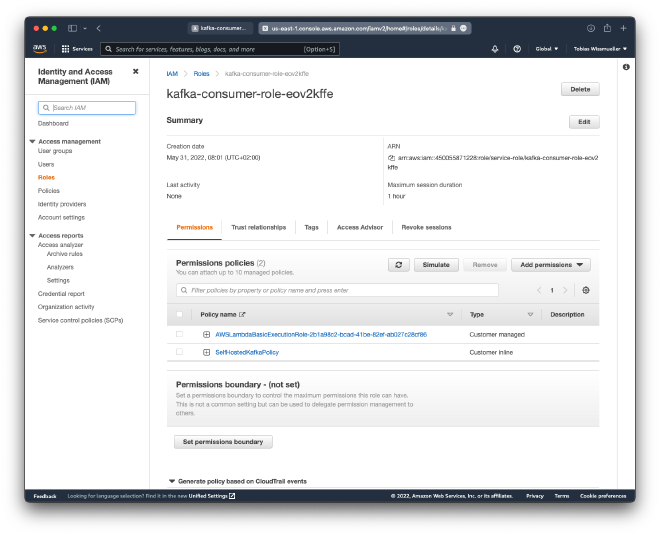
This was the trickiest part of the tutorial. Well done if you managed to get up-to here. There is only one small step left before we can test everything.
Create Trigger #
Click on “Add Trigger” and select the “Apache Kafka”-trigger.
Add the endpoint-name of your Kafka cluster under “Bootstrap servers” and also the topic name.
Under “Authentication” click “Add” and provide the secret from above.
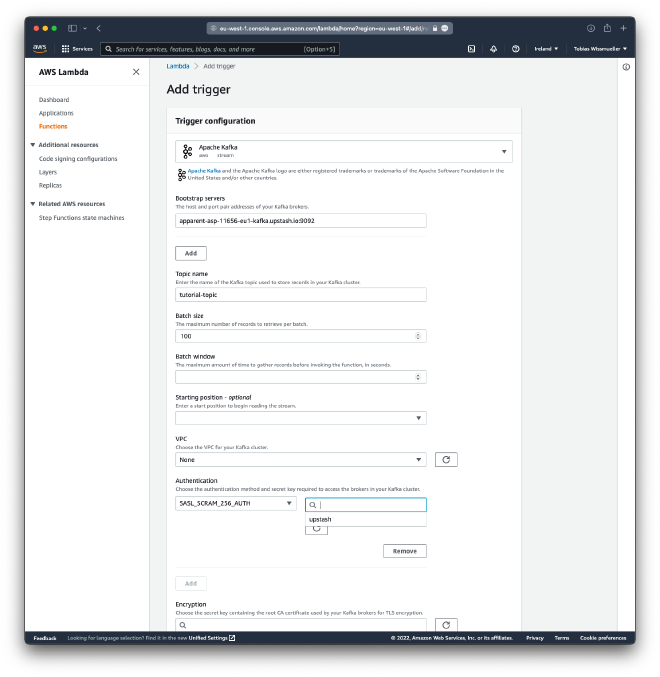
Then click “Add”. If everything is successful we come back to the page of our function.
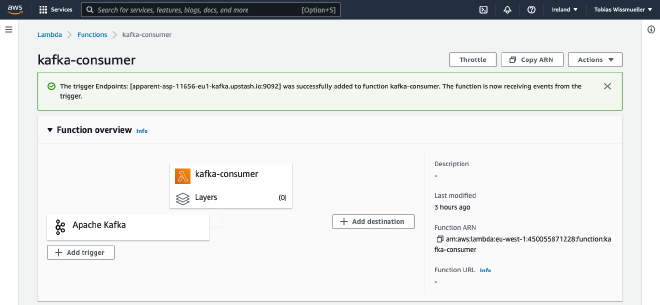
We are done now setting up everything. I hope this worked for you.
It is time to test everything.
Testing the Setup #
While still being in AWS, click on “Monitor”
On your local machine start the kafka-console-producer again if its not running any more.
kafka-console-producer --bootstrap-server apparent-asp-11656-eu1-kafka.upstash.io:9092 --producer.config upstash.config --topic tutorial-topic
Then send one or more messages.

Under your AWS CloudWatch metrics you should see the invocation of the Lambda function.
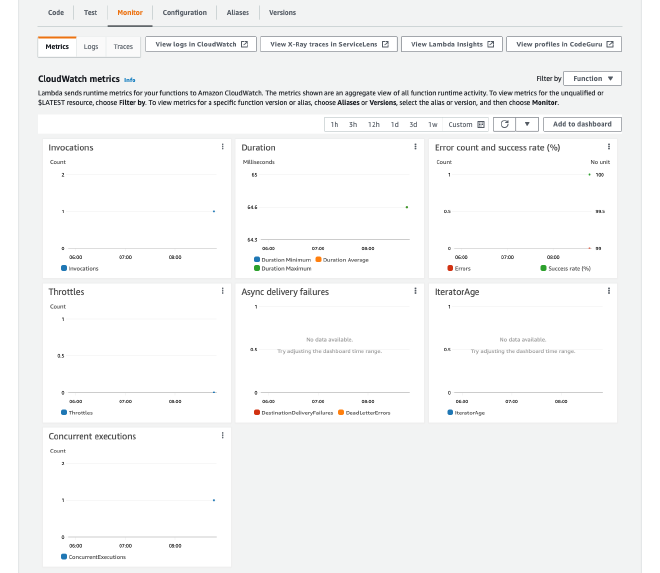
Click “View logs in CloudWatch” which leads to this page.
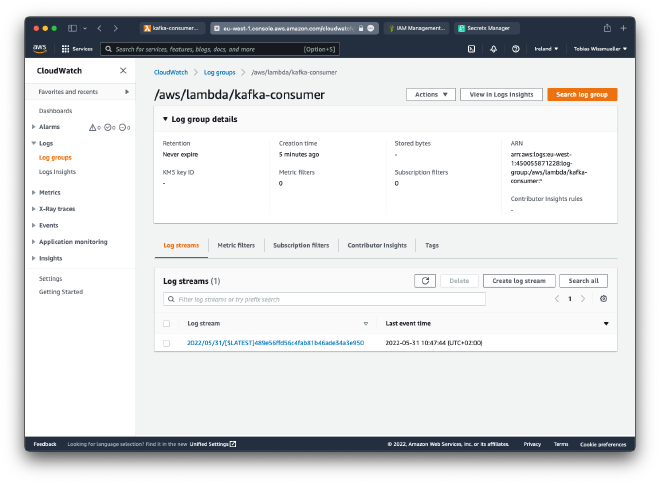
Here, select the log stream which will open a page showing the contents of the log stream.
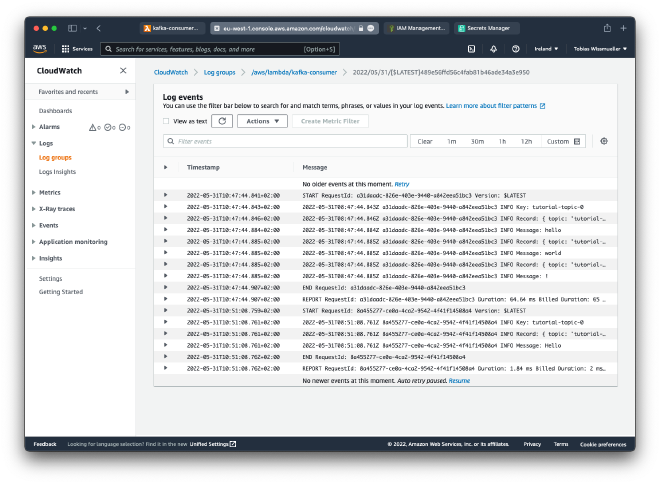
There it is! In the third last line is the message I have sent “Hello”. Depending on what you have sent you will find your message here as well.
Conclusion #
What a trip! We have started with generating Kafka messages on a local machine, which then have been sent to a Kafka instance on Upstash and finally were received by a Lambda function on Amazon AWS to perform an action.
I hope you have enjoyed this tutorial and that it will be useful for you. Feel free to ping me in the comments sections for any questions, suggestions on how to improve this tutorial or in case you have an idea for a new topic or tutorial that you want to see in my blog.
Thank you for reading!
- If you enjoyed this, please follow me on Medium
- Buy me a coffee to keep me going
- Support me and other Medium writers by signing up here
https://twissmueller.medium.com/membership
This post contains affiliate links and has been sponsored by Upstash.