Building a GPT Client for Android with Jetpack Compose in Kotlin
Adding AI-Generated Text to Your Android App with Jetpack Compose and GPT #
This tutorial teaches you how to build a GPT client for Android using Jetpack Compose in Kotlin. The tutorial covers how to send a request to the OpenAI GPT API and decode the JSON response to display the generated text.
Note that this tutorial will focus on the logic for sending and receiving requests to and from the OpenAI GPT API, and will not cover all the UI details involved in building the app.
For the full code, including the UI implementation, you can visit my Github repo containing working code samples for creating iOS and Android apps
What is GPT? #
GPT, or Generative Pre-trained Transformer, is a type of machine learning model that is capable of generating natural language text. It is a type of language model that has been pre-trained on large amounts of text data, and can be fine-tuned for specific tasks, such as generating text in response to a prompt.
What will we build? #
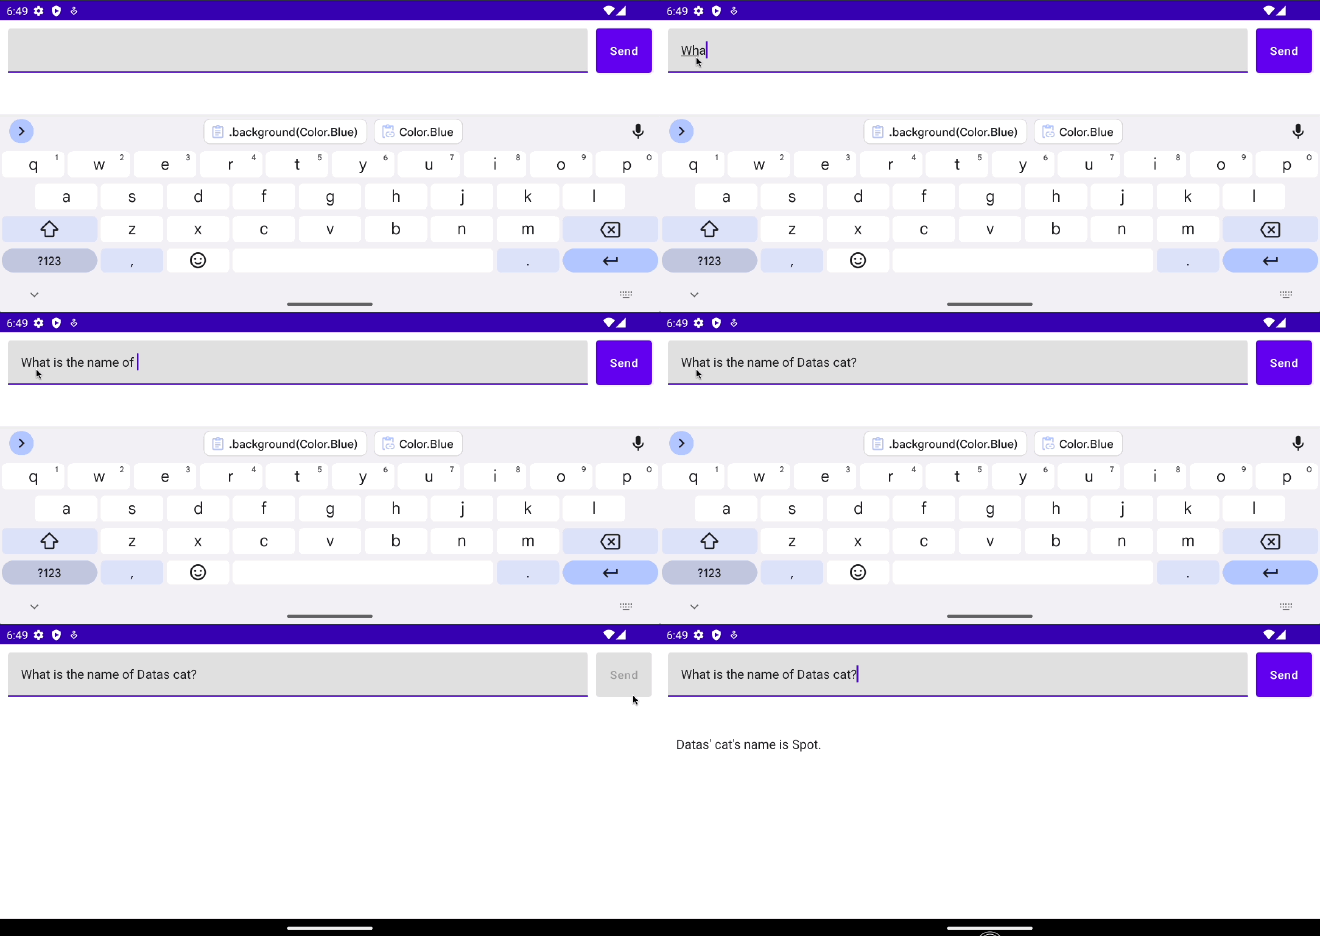
We will build an app that takes a user input from a TextField, sends it to the GPT API, receives the response, and decodes the JSON in order to display the answer as animated Text. The sendRequest function is responsible for communicating with the OpenAI GPT API. After encoding the user’s question as a JSON payload, it sends a POST request to the API. If the API responds with a status code of 200, the function extracts the generated text from the JSON response and displays it in a Text view. If the API responds with an error, the function displays an error message instead.
Here is an animated screenshot of the final app:

Sending a Request to the GPT API #
We will now show the code that is necessary to send a request to the GPT API. A step-by-step explanation will follow.
data class GptRequest(
    val prompt: String,
    val max_tokens: Int,
    val model: String
)

data class GptResponse(
    val choices: List<Choice>
)

data class Choice(
    val text: String
)

interface GptApi {
    @Headers(
        "Content-Type: application/json",
        "Authorization: Bearer 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"
    )
    @POST("/v1/completions")
    fun getCompletion(
        @Body requestBody: GptRequest
    ): Call<GptResponse>
}

class ContentViewModel : ViewModel() {

    var answer by mutableStateOf("")
        private set

    var isLoading by mutableStateOf(false)
        private set

    val retrofit = Retrofit.Builder()
        .baseUrl("https://api.openai.com")
        .addConverterFactory(GsonConverterFactory.create())
        .build()

    val api = retrofit.create(GptApi::class.java)

    fun sendRequest(question: String) {
        val request = GptRequest(
            prompt = question,
            max_tokens = 100,
            model = "text-davinci-003"
        )

        viewModelScope.launch(Dispatchers.IO) {
            isLoading = true
            val call = api.getCompletion(request)
            val response = call.execute()
            isLoading = false

            if (response.isSuccessful) {
                val choice = response.body()?.choices?.get(0)
                viewModelScope.launch(Dispatchers.Main) {
                    choice?.text?.let {
                        answer = it
                    }
                }
            } else {
                viewModelScope.launch(Dispatchers.Main) {
                    answer = "Error: ${response.code()} - ${response.message()}"
                }
            }
        }
    }
}
The source code above allows the app to communicate with the OpenAI GPT API. Here is a brief explanation of the main parts of the code:
data class GptRequestrepresents the JSON payload that will be sent to the OpenAI API to request a generated text.data class GptResponserepresents the JSON response that will be received from the OpenAI API, and contains the generated text.data class Choiceis a nested data class inside GptResponse that contains the generated text.interface GptApidefines the REST API that will be used to communicate with the OpenAI API. ThegetCompletionfunction sends aPOSTrequest to thev1/completionsendpoint with aContent-Typeheader ofapplication/jsonand anAuthorizationheader containing the API key.class ContentViewModelis a ViewModel for handling the app’s data and logic. It contains asendRequestfunction that takes a user’s question, sends it to the OpenAI API, and sets theanswervariable to the generated text.var answer by mutableStateOf("")is a reactive variable that holds the generated text, and can be observed by the UI in order to display it.var isLoading by mutableStateOf(false)is a reactive variable that indicates whether a request is currently being sent to the OpenAI API, and can be observed by the UI in order to display a loading spinner.val retrofit = Retrofit.Builder()creates a Retrofit instance that will be used to communicate with the OpenAI API.val api = retrofit.create(GptApi::class.java)creates an instance of theGptApiinterface using the Retrofit instance.fun sendRequest(question: String)is a function that sends a request to the OpenAI API. It creates aGptRequestobject, sends it to the API using theapi.getCompletion(request)function, and then sets theanswervariable to the generated text if the response is successful, or displays an error message if the response is unsuccessful.Dispatchers.IOandDispatchers.Mainare used to run the network requests and UI updates on separate threads.
Note: The Authorization header in the code above contains an API key that is specific to the developer who created it, in this case me. If you plan to use this code, you will need to replace the API key with your own. Using my API key will result in an error as it has been invalidated prior to the release of this tutorial.
To obtain an API key for the OpenAI API, you will need to create an account on the OpenAI website (openai.com). Once you have an account, navigate to the API section of the website and follow the instructions to create an API key. Make sure to keep your API key secure and do not share it with others.
Conclusion #
In this tutorial, we build an Android app that takes user input, sends it to the OpenAI GPT API, and displays the generated text.
I hope you found this tutorial informative and that it has inspired you to create your project based on the GPT API. If you have any questions or feedback, feel free to leave a comment.
The full code can be downloaded from my repo that contains working code samples for creating iOS and Android apps: https://github.com/twissmueller/mobile-snippets
Thank you for reading!
- If you enjoyed this, please follow me on Medium.
- Buy me a coffee or send me a tip.
- Support me and other Medium writers by signing up here.